Some things:

My photo
I paint small metal and plastic figures and rarely get to play with them. But that is fine with me.

18 September 2013

Humber Recce Platoon - WIP (Part 2)

These fellows are almost done. I went back on what I declared regarding stowage, they just looked too plain with out any pieces. I still kept it minimal though, not at all like the pictures I've found on the net of similar recce vehicles all laden down with boxes and tarps, etc. I also decided to add some to the universal carrier that I use as Patrol leader to differentiate him from the others.

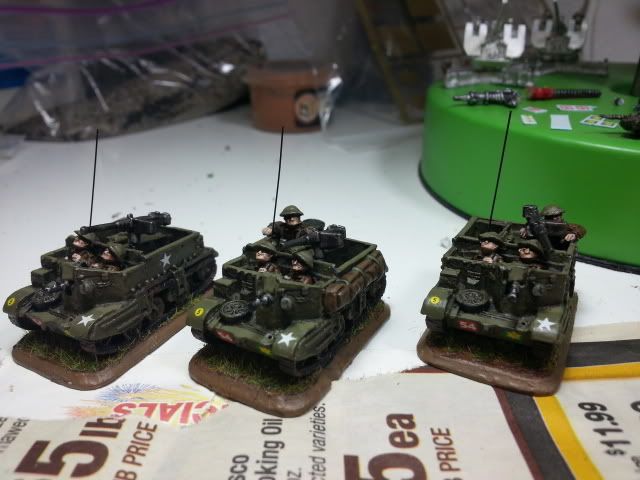
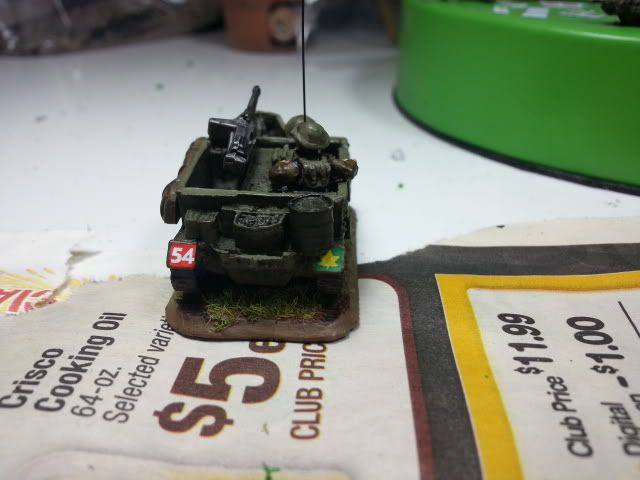
Carriers seen here with some lovely .50cals to chew up those pesky German 1/2-tracks. The one in the middle has the stowage, tarp on it's flank as seen and oil drum on it's rear. The tarp piece was from the Open Fire Shermans sprues.
 

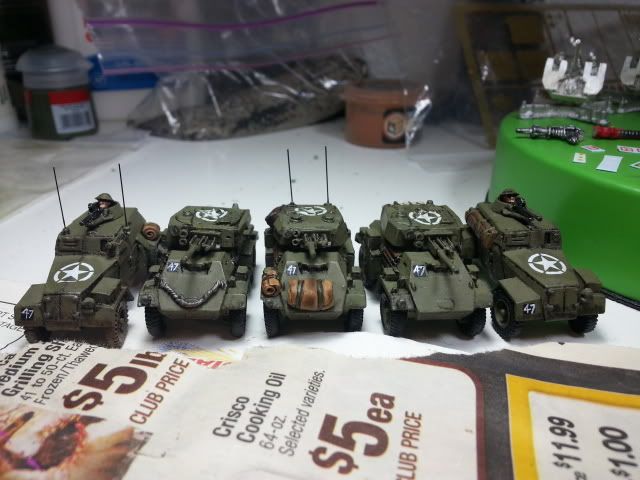
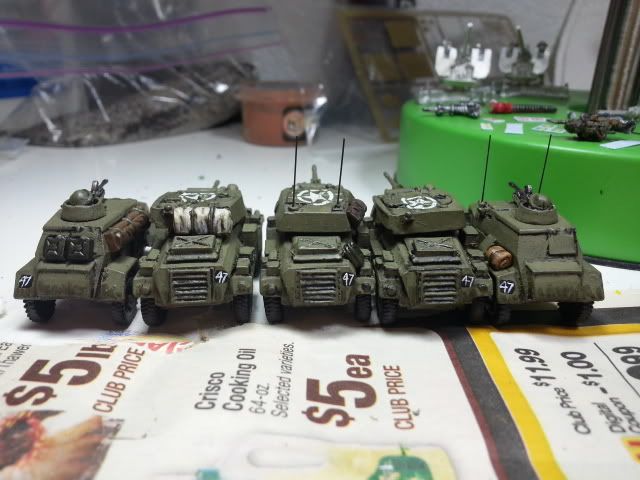
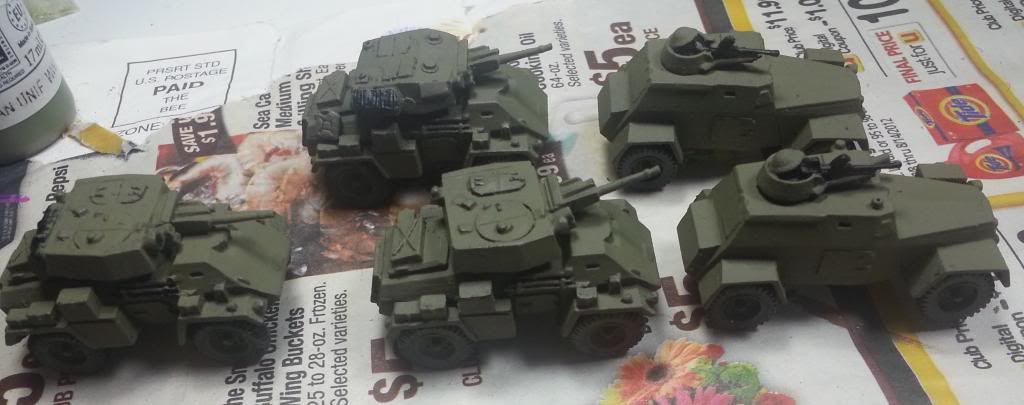
With Allied stars stuck on top of the Humbers so some Tiffie doesn't think to confuse them with Hun vehicles, all that's left to do on these chaps is to get unit marking decals (Ordered as you read this.) and they are ready to throw into combat. One issue I'm having is which markings would be the correct ones? The 4th Canadian Army have the Humber Armoured Car option on both the Rifles and Armoured lists, yet my research online has not shown the 4th Canadian using Humbers at all during the Holland operations (Training in England prior to D-Day, yes, hence why I've already painted the black square with 47, though that'll be painted over by the time this is posted.), whereas Staghounds seem to be their Armoured Car of choice. So I'm thinking that I'll have to make this from the lot 12th Manitoba Dragoons that weren't Division specific as far as I can tell and so may well have run with the 4th Canadians.
(Feel free to correct me on this as I'd rather get it right.)


 These are going to be the last units I do for my Late War collections for a bit as I've a new project to get on with, my first Mid-War specific list. With the November tournament being Mid-War and the recent release of the updated Mid-War Brits in Italy lists, I've decided to throw together as much stuff as I already own (Keeping things affordable) to make a company for the tourney. So I've made an 8th Army Motored Infantry list. All I've got to get are transport vehicles and I'll have everything I need - not bad for a completely new army. (I will cheat on the carrier patrols though and use the two I've already got painted up, even though they are marked for Guards and Canadian.... To be replaced at a later date.)

This is my list. I think it'll do poorly as British mechanised companies are not lauded at all for their abilities to win, but I aim to try to prove that wrong! :)

 So along with the commissions I am supposed to already be working on, that's a little less than two months to get most of an army painted. I reckon I can do it. :)

05 September 2013

Humber Recce Platoon - WIP (Part 1)


Whilst waiting for Total War: Rome2 to install on my PC (Yet to play mind.), I decided in between glasses of wine to slap some paint on my next platoon for my Canadians.


Offering more options for reconnaissance in my lists, the Recce Armoured Car platoon is a fun option to stick in 3 Humber III’s and 2 Humber III LRC’s with option to add up to two Universal Carrier Patrols. So potentially 3 Recce platoons all in one slot – not bad.

I do love my Universal Carriers and find it hard not to hum the Benny Hill theme tune as I move them about on the table, but one of my favourite units in the British/Commonwealth arsenal are the Armoured Cars. They are only marginally better armed than a Carrier, but being wheeled they can hustle way faster about the board, especially on roads. Only poor side of them is that being wheeled means that in any rough terrain slows them to a horrible 4” a turn! (Last tournament I played in, I was stuck on a snow table and my poor 6pdr Portee trucks were next to useless as the whole board was snow! >_< )

So base coat of Russian Uniform Green done on all 5 vehicles. Next up, I’ll take care of the wheels, stowage and other details. I am not all that fond of over-the-top stowage on tanks, feeling that the lines of the tank are lost amongst all the jumble of canvases, etc. So these may seem a little stowage light to most eyes - matter or preference really.


 These were super fast to paint, so I'm hoping I'll have them done and dusted by Sunday. Though a trip to the movies tonight for the new Riddick flick and Game Night with my rpg mates tomorrow night might make that deadline a little tricky to meet. We'll see! (At the very least I'll be painting as I watch my Raiders get creamed by the Colts on Sunday. O dear, a Brit who's into NFL - whatever next?)

04 September 2013

For the love of the Pizza Box

Greetings! Today I will talk about a fun piece of kit in the FOW Canadian lists (from the Market Garden book) - the Land Mattress. 

Originally a Rocket Launcher fired from Naval vessels (The Sea Mattress), the Canadian army was so impressed with it's results, they decided a land version was required (The British army decided to stick with their standard artillery - yawn.) and so the Land Mattress with it's battery of up to 30 x 60lb rockets was developed and sent at the German defenders in Later War.


In Flames of War rules, these guys are an all too affordable (Points-wise) Rocket artillery piece that outshines it's German counterparts easily. With each team counting as 4 rockets (Nebelwerfers count one for one.), a platoon of four Mattresses offers it's controlling player a 16-"gun" devastating bombardment, using the super fun 12"x12" bombardment template, lovingly known as the "Pizza Box" in gaming circles. That's a lot of rockets (And hopefully a lot of targets to try to hit!) Shame it's only Anti-tank 3, but if it hits, any firepower rolls are made on a 4+ and I'll not sneeze at that.At around 245 points for a Confident Veteran platoon, I feel it's a steal.


So, without further ado, I present my own platoon (Minus the command team, because muggins here in typical fashion completely got carried away and forgot to put one together..... *facepalm* Soon, soon.) that I finished last night. 

The models themselves went together quite easily, with only a small amount of shaving and filing to make them fit correctly. Painting-wise, it all was simple, until I got to the rockets themselves.... all those dots and rings.... Why the Canadian armourers couldn't sort out a different method of rocket identification, I'll never know - what a pain! (But it's done now, so calm down.)

As you’ll see on the bases, I tried to make it look like these rockets had been fired a few times already, blackening and scouring the ground behind. Maybe not enough, but I think I got the effect I was after. I got the idea after looking up a vid or two of Nebelwerfers firing and noting just how much as each rocket shot off, the turf directly behind the launcher was flying in all directions. Sadly, when I made my own markings into the ground, I was somewhat enjoying my second bottle of wine, so they are not quite as accurate as they could have been (Should be more “golf divot-ish”.) but this will do. I also used some Tamiya Soot weathering powder on the launcher itself and the ground, over black wash to try to make the effect all the better. Let me know what you think.


Tried to show the observer team as a "Deep in no-man's land" with the rifle chap nervously swinging behind after hearing a sound from that copse of trees...


A closeup.

The pink on the back of the bases is so I can tell which stand belongs to which platoon. Pink was the only easily identifiable colour I had left!